this writing is for your reading pleasure only. its suggested that you do not try to make a potato launcher
the first 2 pictures are of the stuff you will need.
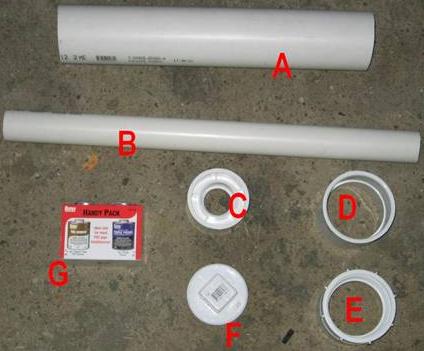
( supply list )
A = 16 inches of 3 inch pvc pipe
B = 2 feet of 1 1/2 inch pvc pipe ( we suggest 2 feet minimum )
C = 3 inch to 1 1/2 inch reducer
D = 3 inch to 3 inch fitting
E = 3 inch to 3 inch threaded fitting
F = 3 inch threaded end cap
G = pvc primer & pvc cement
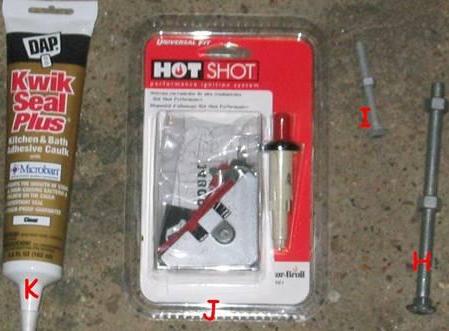
H = 6 inch bolt 1/2 inch diameter with 2 nuts
I = 2 3/4 inch bolt 1/4 inch diameter with 1 nut
J = grill ignition switch
K = silicone. white or clear, you choose!
NOTE: make sure to use pvc primer before you cement the pvc together.
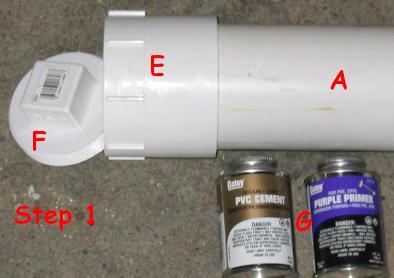
STEP 1:
(-) prime & cement part E to either side of part A.
(-) screw part F into part E.
(-) do NOT cement part F & part E together.
(-) screw part F into part E.
(-) do NOT cement part F & part E together.
STEP 2:
(-) prime & cement part D to the other end of part A. ( either side of D )

STEP 3:
(-) prime & cement part C to either end of part B (only one side of C fits B)

STEP 4:
(-) prime & cement part C into part D (there is only one way C can connect to D)

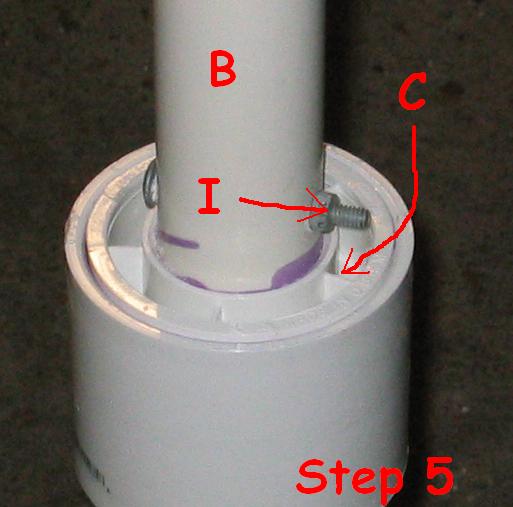
STEP 5:
(-) Drill a 1/4 inch hole in part B 1 inch from part C.
(-) Insert part I (2 3/4 inch bolt) through 1/4 inch hole.
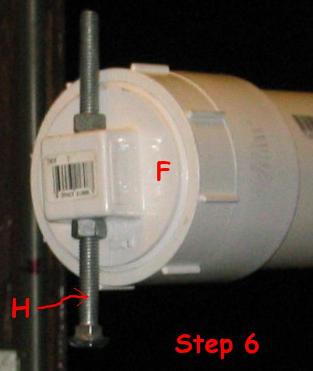
STEP 6:
(-) Drill a 1/2 inch hole in part F.
(-) Insert part H (6 inch bolt) through 1/2 inch hole in part F.
(-) Tighten the 2 nuts to the bolt (as pictured).
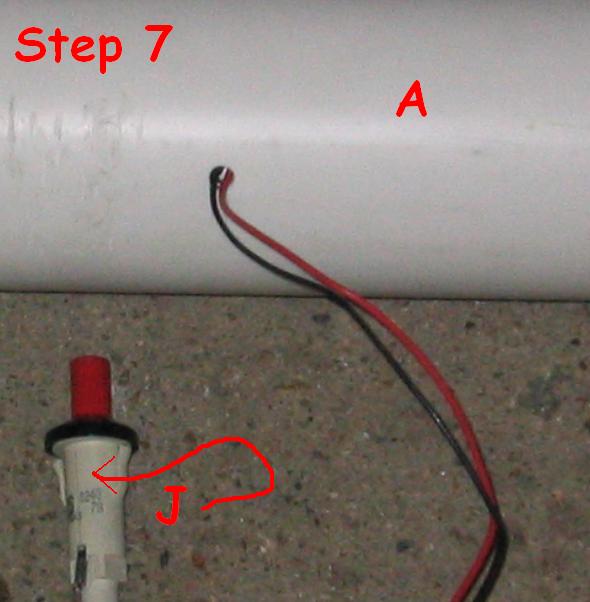
STEP 7:
(-) Drill a tiny hole in part A about 3 inches back from part D (for wires to go in)
NOTE: see step 8 picture for better visual.
(-) Insert the 2 wires from part J into the hole and assemble the grill ignition switch inside part A.
(-) Now click the ignition switch and look in part A to make sure you see the spark.
NOTE: you MUST have spark before moving on.
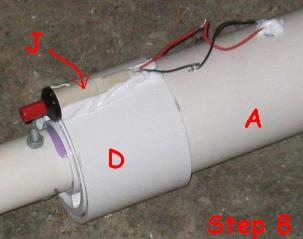
STEP 8:
(-) Now silicone the grill ignition switch to part D as shown. put the black lip of the switch onto the edge of part D.
(-) Add a little silicone in the hole where the 2 wires go into part A.
NOTE: this is a messy method but it works!
(-) After you apply the silicone to your launcher you can dip your finger in a cup of water and smooth it out. (while the silicone is still wet)
NOTE: You will want to let this silicone dry over night before going on to step 9.
STEP 9:
(-) Before you finish with the silicone make sure you can still see the spark.
(-) Now silicone the switch and wires down completely.
NOTE: You will want to let this silicone dry over night.

Give your new potato launcher a good “once over” for safety!
Remember this writing is not responsible for your actions.
If your launcher doesn't match the picture below then something went wrong.

No comments:
Post a Comment